Introduction
In JavaFX, ListViews are everywhere. They’re used as the pop-up in ComboBoxes and some other controls, so many programmers are familiar with them even if they haven’t directly used ListView. Most programmers, however, never go very deep into understanding ListView, they’ll simply create an ObservableList of String and then stuff it into a vanilla ListView to put a scrolling list on the screen. To do anything more interesting, they’ll jump over to TableView instead.
But ListView can do so much more! In many cases, a ListView can be a much more appropriate vehicle to display complex data than TableView.
In this article, we’ll begin by showing the simplest usage of ListView, then we’ll take a look at how to do something much more involved.
The Basic ListView
The simplest implementation of a ListView is to use it to display a list of Strings or some other object that supports toString() nicely. In this case, you just create the ListView, connect it to your ObservableList and you’re done. Let’s take a look at that:
public class BasicListViewApplication extends Application {
@Override
public void start(Stage primaryStage) throws Exception {
Scene scene = new Scene(createContent());
primaryStage.setScene(scene);
primaryStage.show();
}
private Parent createContent() {
ListView<String> listView = new ListView<>();
ObservableList<String> animals =
FXCollections.observableArrayList("Bear", "Bird", "Hedgehog",
"Lobster", "Owl", "Shark");
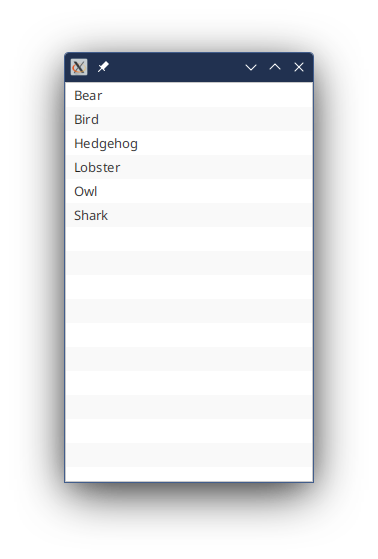
listView.setItems(animals);
return listView;
}
}
And it looks like this:
Using Non-String Values
Anything that can support Object.toString() can be used as a data type in a ListView. We’re going to use a custom Enum type to show some more techniques, so let’s introduce it here and show how it works with a basic ListView
public enum Animal {

    BEAR("Bear", "bear.png"),
    BIRD("Bird", "bird.png"),
    HEDGEHOG("Hedgehog", "hedgehog.png"),
    LOBSTER("Lobster", "lobster.png"),
    OWL("Owl", "owl.png"),
    SHARK("Shark", "shark.png");
    private final ImageView imageView;
    private final String name;

    Animal(String name, String imageName) {
        this.name = name;
        this.imageView = new ImageView(BasicListViewApplication.class.getResource("images/" + imageName).toExternalForm());
    }

    public ImageView getImageView() {
        return imageView;
    }

    public String getName() {
        return name;
    }

    @Override
    public String toString() {
        return name;
    }
}
Using an ImageView right in the Enum isn’t really a good idea, but it’s a little cheat that will keep the first example that uses it simple. We’ll fix this up later.
and now the application would look like this:
public class BasicListViewApplication extends Application {
    @Override
    public void start(Stage primaryStage) throws Exception {
        Scene scene = new Scene(createContent());
        primaryStage.setScene(scene);
        primaryStage.show();
    }

    private Parent createContent() {
        ListView<Animal> listView = new ListView<>();
        ObservableList<Animal> animals =
               FXCollections.observableArrayList(Animal.BEAR, Animal.BIRD, Animal.HEDGEHOG,
                                                 Animal.LOBSTER, Animal.OWL, Animal.SHARK);
        listView.setItems(animals);
        return listView;
    }
}
Which gives exactly the same display as before. We just let the Animal.toString() function do the heavy lifting.
For a lot of programmers, that’s all they’ll ever did with ListView, and that’s a shame. ListView can do so much more.
Customizing the Display
The basic display unit of a ListView is the ListCell. ListCell is a subclass of Labeled which means that, in many ways, it behaves just like a Label. Most importantly, it has both a Graphic and a Text component, both of which can be displayed together or independantly. Ordinarily, we just see the Text component as the default behaviour of ListCell is just to use toString() on the value and put it in Text component.
Loading Custom Cells
You can customize the ListCell to make its behaviour change. This involves first telling your ListView that it needs to load a custom ListCell. This is done via the ListView.setCellFactory() method. Let’s look at the signature of this:
public final void setCellFactory(Callback<ListView<T>,ListCell<T>> value)
This method takes a Callback. A Callback is basically the same as a Function, but the name implies that it’s supposed to be passed as a parameter of a method which will invoke the Function (it will “call back” to the Function) as part of what it does.
In this case, we expect that some piece of internal JavaFX code will take our ListView, pass it to the Callback and get a ListCell back. So we need to write the logic in our Callback which will create our custom ListCell on demand.
Here’s the code that will do that:
public class BasicListViewApplication extends Application {
    @Override
    public void start(Stage primaryStage) throws Exception {
        Scene scene = new Scene(createContent());
        primaryStage.setScene(scene);
        primaryStage.show();
    }

    private Parent createContent() {
        ListView<Animal> listView = new ListView<>();
        listView.setCellFactory(lv -> createCell());
        ObservableList<Animal> animals =
                 FXCollections.observableArrayList(Animal.BEAR, Animal.BIRD, Animal.HEDGEHOG,
                                                   Animal.LOBSTER, Animal.OWL, Animal.SHARK);
        listView.setItems(animals);
        return listView;
    }

    private ListCell<Animal> createCell() {
        return new ListCell<>() {
            @Override
            public void updateItem(Animal item, boolean isEmpty) {
                super.updateItem(item, isEmpty);
                if (!isEmpty && (item != null)) {
                    setGraphic(item.getImageView());
                    setText(item.getName());
                } else {
                    setGraphic(null);
                    setText(null);
                }
            }
        };
    }
}
The line:
listView.setCellFactory(lv -> createCell());
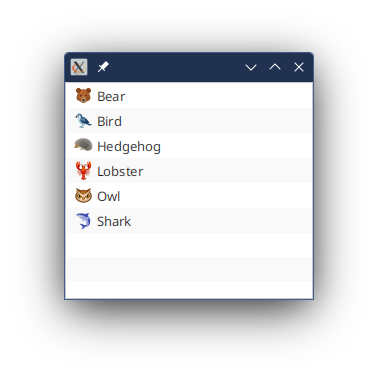
sets the Callback. The createCell() method does the work, which in this case is to create an anonymous inner class which extends ListCell and overrides updateItem().
When you run it, it looks like this:
About Cell.updateItem()
Every ListCell has to support ListCell.updateItem() and the super class that this comes from is Cell, not ListCell. Cell.updateItem() is the basic mechanism by which the data is put into your ListCell. It passes two values: the actual data, and a flag that indicates if the ListCell is empty. This second element is used when your ListView's viewport is longer than the number of items in the list, and it needs to leave some of the rows empty.
It’s important that we clear out all of the visual elements when isEmpty is true. Otherwise we’ll get random data in our empty rows (maybe).
In our custom ListCell, we’re simply putting values into the Graphic and Text elements of the standard ListCell, pulling them from the appropriate parts of item when it’s loaded in.
One of the most important aspects of updateItem() is that it must call super.updateItem(). We’ll see why in a little bit, but for now you should know that if you forget to do this (and you will), then you’re likely to get very strange results in your ListView.
Understanding VirtualFlow
ListView is one of the screen elements in JavaFX that uses something called VirtualFlow. This is a class that extends Region and is used in the skins of a number of classes with many elements inside a scrolling region. We’ve already seen one aspect of this with our call to setCellFactory(), which is part of the VirtualFlow interface.
One of the main characteristics of VirtualFlow is that is a virtualized region of many elements. What this means is that you’ll have a limited number of real screen elements, but they are used and re-used over and over to present a potentially unlimited number of elements in whatever list is backing it. In terms of ListView, this means that if the ObservableList that you install using ListView.setItems() is huge, you’ll still only have a limited number of ListCells created to display those on the screen. Typically, this amount is only slightly more than the number of rows that can be displayed on the screen at one time. If you do something at runtime to make the viewport of the ListView bigger, then it will create a few more ListCells so that it can fill the viewport.
Why do you care about this?
You care about this because this radically alters the approach you need to take when designing your ListCells. For the most part, all of the ListCells that you’ll have are created when the ListView is first shown on the screen. Then those handful of ListCells are going to be loaded via Cell.updateItem() with the data from the underlying List that are going to be shown in the viewport of the ListView. As the user scrolls through the ListView, some items will scroll out of the viewport and off the screen, the ListCells that held them are now free to be resused, and they will be filled with data from items that are scrolling into the viewport.
The implication of this is that Cell.updateItem() is going to get called a lot.
Seriously…a lot.
So you want it to run lightning fast. And this is why the commentary from the JavaDocs is misleading:
The updateItem method should not be called by developers, but it is the best method for developers to override to allow for them to customise the visuals of the cell.
and then:
However, the purpose of having the updateItem method is so that developers, when specifying custom cell factories (again, like the ListView cell factory), the updateItem method can be overridden to allow for complete customisation of the cell.
If you do as this says, and “customise the visuals of the cell” in Cell.updateItem(), then your application will choke when the users scroll through your ListView with any speed. That’s because creating a layout in JavaFX is fairly heavy-weight, and it’s slow.
Everybody knows this.
Everbody understands that a better approach is to create your layout in your ListCell constructor and then just put the data into it via Cell.updateItem().
Let’s take a look at this with our Animals example:
Customizing the Graphic Layout
The first thing we’re going to do is clean up Animals and remove the ImageView, which is a screen Node and replace it with Image, which isn’t a screen Node:
public enum Animal {
    BEAR("Bear", "bear.png"),
    BIRD("Bird", "bird.png"),
    HEDGEHOG("Hedgehog", "hedgehog.png"),
    LOBSTER("Lobster", "lobster.png"),
    OWL("Owl", "owl.png"),
    SHARK("Shark", "shark.png");
    private final Image image;
    private final String name;

    Animal(String name, String imageName) {
        this.name = name;
        this.image = new Image(BasicListViewApplication.class.getResource("images/" + imageName).toExternalForm());
    }

    public Image getImage() {
        return image;
    }

    public String getName() {
        return name;
    }

    @Override
    public String toString() {
        return name;
    }
}
Now we can’t just take the ImageView and put it into Graphic, we need to create a layout in the ListCell that has an ImageView in it, then stuff the Image into the ImageView through Cell.updateItem():
public class BasicListViewApplication extends Application {
    @Override
    public void start(Stage primaryStage) throws Exception {
        Scene scene = new Scene(createContent());
        primaryStage.setScene(scene);
        primaryStage.show();
    }

    private Parent createContent() {
        ListView<Animal> listView = new ListView<>();
        listView.setCellFactory(lv -> createCell());
        ObservableList<Animal> animals = FXCollections.observableArrayList(Animal.BEAR, Animal.BIRD, Animal.HEDGEHOG, Animal.LOBSTER, Animal.OWL, Animal.SHARK);
        listView.setItems(animals);
        return listView;
    }

    private ListCell<Animal> createCell() {
        return new ListCell<>() {
            private final ImageView imageView = new ImageView();

            @Override
            public void updateItem(Animal item, boolean isEmpty) {
                super.updateItem(item, isEmpty);
                if (!isEmpty && (item != null)) {
                    imageView.setImage(item.getImage());
                    setGraphic(imageView);
                    setText(item.getName());
                } else {
                    setGraphic(null);
                    setText(null);
                }
            }
        };
    }
}
That’s not really a whole lot of change, but it’s philosophically huge. Let’s go one step further and put the ImageView inside a styled StackPane so that it looks like a layout:
public class BasicListViewApplication2 extends Application {
    @Override
    public void start(Stage primaryStage) throws Exception {
        Scene scene = new Scene(createContent());
        primaryStage.setScene(scene);
        primaryStage.show();
    }

    private Parent createContent() {
        ListView<Animal> listView = new ListView<>();
        listView.setCellFactory(lv -> createCell());
        ObservableList<Animal> animals = FXCollections.observableArrayList(Animal.BEAR, Animal.BIRD, Animal.HEDGEHOG, Animal.LOBSTER, Animal.OWL, Animal.SHARK);
        listView.setItems(animals);
        return listView;
    }

    private ListCell<Animal> createCell() {
        return new ListCell<>() {
            private final StackPane layout = new StackPane();
            private final ImageView imageView = new ImageView();

            {
                layout.getChildren().add(imageView);
                layout.setPadding(new Insets(3));
                layout.setBackground(new Background(new BackgroundFill(Color.CYAN, null, null)));
            }

            @Override
            public void updateItem(Animal item, boolean isEmpty) {
                super.updateItem(item, isEmpty);
                if (!isEmpty && (item != null)) {
                    imageView.setImage(item.getImage());
                    setGraphic(layout);
                    setText(item.getName());
                } else {
                    setGraphic(null);
                    setText(null);
                }
            }
        };
    }
}
And now it will look like:
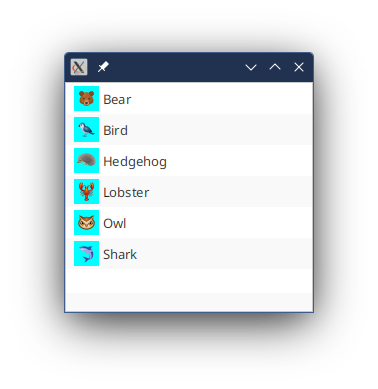
Ok, that’s more like a layout. Let’s look at what’s happening here…
With an anonymous inner class you use the {} for the constructor, so you can see that we’re creating the layout in the constructor. The layout is just a StackPane, and we’ve got some padding and a BackgroundFill on it. Once it’s done, though, it’s done. We’re not going to mess with the layout outside that constructor.
Now updateItem() does two things. First, it stuffs the Image into the ImageView. Then it sets Graphic to our layout, and Text to the name.
Conclusion
Hopefully, you now have a good understanding about how ListView works, and how the data from your underlying List gets into the ListCells. We’ve gone from the generic ListView showing a list of Strings in a scrolling pane, to handling the data transfer into each Cell and customizing how it’s displayed.
This is a big step forward, but we’re still treating Cell very much like a Label. In the next article we’ll look at how to treat ListView as a vehicle for displaying custom layouts.