Introduction
I don’t really understand where the mania to swap Scenes comes from, but I see tons of posts, videos and questions about how to swap Scenes in JavaFX. Most of the time, it’s in the context of FXML, and I suspect that this is because FXML makes it harder to do something more sensible than swap Scenes in a Stage.
The Challenge with Swapping Scenes
The “hard” part about swapping Scenes is that it needs to be done via Stage.setScene().
Why is this hard?
It’s hard because Stage is passed to the start() method in your Application class. If you’re making even a half-hearted attempt to organize your application properly, then all of the code that initiates the Scene swap is going to be somewhere else. This means that you somehow have to find a way to have a reference to your Stage somewhere in your layout code.
The most obvious (but horribly bad) way to do this is something like this:
public class Layout1Builder implements Builder<Region> {

    @Override
    public Region build() {
        Button button = new Button("Change to Scene 2");
        button.setOnAction(evt -> {
          Scene newScene = new Scene(new Layout2Builder.build());
          button.getScene().getWindow().setScene(newScene));
        });
        VBox results = new VBox(20, new Label("Welcome to Scene 1"), button);
        results.setPadding(new Insets(50));
        return results;
    }
}
Here we call button.getScene().getWindow() which will give you a Window which is the direct ancestor to Stage and which has the setScene() method. This will work, but it breaks the first of the two cardinal rules of JavaFX design:
- Don’t reach up into a parent.
- Don’t peak inside a child.
As soon as you break either of these rules, you start to cross over into coupling hell. Any separation that you tried to create by organizing your application into separate classes and packages and whatever is now compromised and you might as well have not bothered.
So just don’t do it.
The other problem is that your layout code needs to know about whatever is going to replace it in the Stage. So now we have yet another dependency. This one is because Scene 1’s layout code needs to have a reference to another Scene, in order to put it into the Stage. Same thing holds with that other Scene if you want to go back. Almost by definition, these two Scenes have no actual functional relationship to each other since they can’t co-exist on the Stage. Yet they now are dependent on each other because of the Scene swapping.

This dependency is just dead weight. It's coupling with no real value that you have to cope with in your code forever.
So just don’t do it.
How To Overcome This Challenge
The big problem is that you are making the handling of your Stage dependent on your layout. You need to eliminate that.
The best way to do that is a technique called “Dependency Inversion”, which is going to make the layout dependent on the Application class (the reverse of how it started). Then we’re going to make that dependency palatable by using “Constructor Dependency Injection”.
What these fancy terms mean is that we are going to create a constructor parameter in the layout class which is going to require a functional element that will handle whatever work required to swap Scenes. This functional element can be as simple as a Runnable, and if not that, then a Consumer.
The result of this is that the layout is now dependent on some functionality being passed from Application, but that dependency is clearly advertised as a constructor parameter to the layout. So the layout is saying, “If you want to use me, you have to supply a Runnable that does something useful.” And we name that constructor parameter in some meaningful way so that everyone understands what it’s intended to do.
Now we’ve eliminated the dependency of the Application class on the layout classes.
You might be saying to yourself, “Yes, but the Application is still dependent on the layouts, because that is what triggers the Scene swap”.
That’s not quite true, though.
For sure, there needs to be something in the layout that allows the user to trigger the scene swap. But that’s a UX (User Experience) dependency, not a programming dependency. Of course, all the requirements of the UX need to be satisfied by the layout, and only the layout, because that’s what it’s there for. But that dependency is between the layout and the User, and doesn’t have anything to do with the relationship between the layout and the rest of the application.
An Implementation
We’re going to look at how you might implement an approach that does this dependency inversion and constructor dependency injection to allow us to swap between two Scenes by clicking on a Button in each Scene.
First, let’s take a look at the Application class:
public class SceneSwapDemo extends Application {

    @Override
    public void start(Stage primaryStage) throws Exception {
        final Scene scene1 = new Scene(new VBox());
        final Scene scene2 = new Scene(new VBox());
        scene1.setRoot(new Layout1Builder(() -> primaryStage.setScene(scene2)).build());
        scene2.setRoot(new Layout2Builder(() -> primaryStage.setScene(scene1)).build());
        primaryStage.setScene(scene1);
        primaryStage.show();
    }
}
Nothing complicated there. We need to initialize the Scenes independent of their content at first, since the two Builder classes need a Runnable that references the Scenes in order to create the content. So we get an extra two lines of code.
The two Runnables are also very simple. Each one just loads one of the two Scenes that we’ve created into the Stage. Scene 1 loads Scene 2, and Scene 2 loads Scene 1.
Now let’s look at the layout builder for Scene 1:
public class Layout1Builder implements Builder<Region> {
    private final Runnable sceneSwapper;

    public Layout1Builder(Runnable sceneSwapper) {
        this.sceneSwapper = sceneSwapper;
    }

    @Override
    public Region build() {
        Button button = new Button("Change to Scene 2");
        button.setOnAction(evt -> sceneSwapper.run());
        VBox results = new VBox(20, new Label("Welcome to Scene 1"), button);
        results.setPadding(new Insets(50));
        return results;
    }
}
We are using a Builder here because we’re just doing configuration and layout for the VBox that goes into the Scene. We’re not adding new functionality to Region (which really means adding new public methods), so there’s no reason to extend Region.
The value returned from build() is just a VBox with lots of padding and with a Label and a Button in it. The Button is configured to invoke the Runnable passed to the Builder in its constructor.
and, finally, the layout builder for Scene 2, which should be pretty familiar:
public class Layout2Builder implements Builder<Region> {
    private final Runnable sceneSwapper;

    public Layout2Builder(Runnable sceneSwapper) {
        this.sceneSwapper = sceneSwapper;
    }

    @Override
    public Region build() {
        Button button = new Button("Change to Scene 1");
        button.setOnAction(evt -> sceneSwapper.run());
        VBox results = new VBox(20, new Label("Welcome to Scene 2"), button);
        results.setPadding(new Insets(50));
        return results;
    }
}
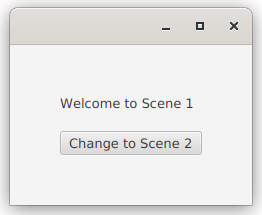
It starts out looking like this:
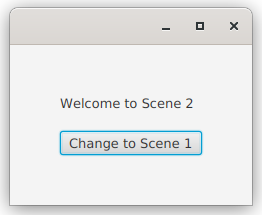
And then looks like this when the Button has been clicked:
Important Things to Note About This Approach
The first thing to note is that SceneSwapDemo has no knowledge about the workings of contents of either scene1 or scene2. It knows that it needs to provide a Runnable to the builders, and that Runnable should swap the Scenes. But it doesn’t know how that Runnable will be used, when it will be used, or how it will be triggered.
The sole dependencies are the constructor parameters that are required for the two layout builders.
On the other hand, the actual layouts in the Scenes have no knowledge of, and therefore no dependency on, the functionality of the Runnables that they invoke. Nor do they know how the Runnables work nor what they do, nor does it matter to them.
Neither layout, and neither layout builder, has any knowledge of the existence of - let alone the content of - the other layout. Certainly, no dependency on it.
This entire thing is almost ridiculously simple.
Better Than Swapping Scenes
I’m not a fan of swapping Scenes. The only place I’ve ever really seen a need for it is when you have a Login screen. In that particular case, the initial Scene is really just a stop along the way to getting the application up and running and you might as well throw it away when you’re done with it.
Generally speaking though, you’re better off swapping out the root of a Scene, or even better yet, swapping out some element of your layout. This is especially true when your application’s screen has some kind of a framework with a global menu, or other things along that line. You can keep those global elements and then swap out selected content. Let’s look at some approaches.
For myself, I tend to look at both Stage and Scene as application framework and not an active part of the content.
Swapping Out the Scene Root
The first thing we’re going to look at is just having a single Scene and using Scene.setRoot() to change the content of the Scene.
public class SceneSwapDemo2 extends Application {
    private Region root2;

    @Override
    public void start(Stage primaryStage) throws Exception {
        final Scene scene = new Scene(new VBox());
        Region root1 = new Layout1Builder(() -> scene.setRoot(root2)).build();
        root2 = new Layout2Builder(() -> scene.setRoot(root1)).build();
        scene.setRoot(root1);
        primaryStage.setScene(scene);
        primaryStage.show();
    }
}
This looks exactly the same as the scene swapping version when it runs.
Due to the cross-referencing between the two layouts, root2 needs to be declared first before they can be initialized. Using a field feels a bit kludgey, but in a real application you’d probably want to get the layout swapping stuff out of start() anyways, and a cleaner way could be implemented.
Swapping Out a Layout Component
Now we get to something which is probably closer to the way that you’d approach this in a real application: Treating the two layouts as custom components which are dynamically swapped inside of a larger layout. For this, we’ll need a wrapper layout:
public class WrapperLayoutBuilder implements Builder<Region> {
    Region customComponent2;

    @Override
    public Region build() {
        BorderPane results = new BorderPane();
        results.setTop(new Label("This is The Wrapper"));
        Region customComponent1 = new Layout1Builder(() -> results.setCenter(customComponent2)).build();
        customComponent2 = new Layout2Builder(() -> results.setCenter(customComponent1)).build();
        results.setCenter(customComponent1);
        return results;
    }
}
You’ll notice that this is very similar to the root swapper code from the last example. Instead of using Scene.setRoot(), we’re using BorderPane.setCenter(). But the logic is the same.
Now the Application code becomes 100% generic, and trivial, which is nice:
public class SceneSwapDemo3 extends Application {

    @Override
    public void start(Stage primaryStage) throws Exception {
        primaryStage.setScene(new Scene(new WrapperLayoutBuilder().build()));
        primaryStage.show();
    }
}
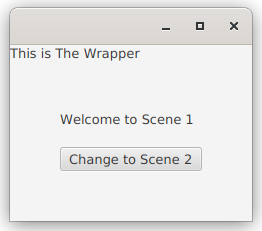
When it runs, it looks like this:
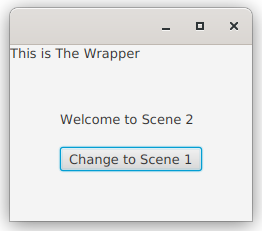
One the button has been clicked once, it looks like this:
Using a TabPane
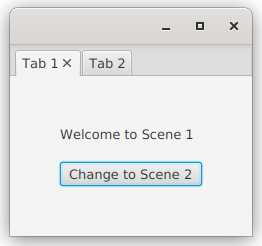
Let’s look at doing something different than swapping out elements, let’s create connections between components in a layout. Here, we’ll put the layouts into a TabPane, and then let the Buttons select the Tabs:
public class TabPaneLayoutBuilder implements Builder<Region> {

    @Override
    public Region build() {
        TabPane tabPane = new TabPane();
        Tab tab1 = new Tab("Tab 1");
        Tab tab2 = new Tab("Tab 2");
        tabPane.getTabs().addAll(tab1, tab2);
        tab1.setContent(new Layout1Builder(() -> tabPane.getSelectionModel().select(tab2)).build());
        tab2.setContent(new Layout2Builder(() -> tabPane.getSelectionModel().select(tab1)).build());
        return tabPane;
    }
}
This example might seem a little bit goofy. Why would you have a Button inside Tab content swap to another Tab? Surely users can just click on the Tab? Sometimes you have a workflow, and while you might want users to be able to move around in a freeform manner using the Tabs, you might also have something like a “Next” Button that walks users through the workflow.
Here the logic is a little bit simpler since the Button actions reference the TabPane and not the contents of the Tabs. This means there’s no issues around referencing variables that haven’t been initialized in a lambda. Otherwise it’s essentially the same as the BorderPane example in how it works.
The Application class is the same as the previous example except it uses TabPaneLayoutBuilder.
It looks like this when it’s running:
Manipulating Visibility
Personally, I prefer not to manipulate layouts - actually changing the content of layout - after they’ve been built. I think it’s better to have everything on the screen and control the look using the Visible and Managed properties of the Nodes. So let’s take a look at that:
public class VisibilityLayoutBuilder implements Builder<Region> {
    Region customComponent2;

    @Override
    public Region build() {
        BorderPane results = new BorderPane();
        results.setTop(new Label("This is The Wrapper"));
        BooleanProperty vBox1Visible = new SimpleBooleanProperty(true);
        Region component1 = new Layout1Builder(() -> vBox1Visible.set(false)).build();
        Region component2 = new Layout2Builder(() -> vBox1Visible.set(true)).build();
        component1.visibleProperty().bind(vBox1Visible);
        component2.visibleProperty().bind(vBox1Visible.not());
        results.setCenter(new StackPane(component1, component2));
        return results;
    }
}
And when it runs, it looks like this:
Here we don’t need have any cross-referencing between the components as Buttons will now manipulate the BooleanProperty which controls the visibility of the two components. With just two components to swap, it’s easy to use a BooleanProperty to control the visibility, but you’ll need something more elaborate to control 3 or more components - but the idea remains the same.
Another aspect of this that I find really appealing is that it’s moving much closer to a “Reactive” design. There’s very little empirical code, just the Runnables, and even those simply update the Model (in this case just the BooleanProperty). The UI changes are due to the bindings between the Model and View elements.
Another Look at Coupling
We’ve just looked at how to swap Scenes and 4 alternatives to swapping Scenes.
Did you notice that we never made any modifications to Layout1Builder and Layout2Builder after they were written for the Scene swap scenario?
What does that tell us? It tells us that the coupling between the two layouts and the infrastructure that holds them is minimal.
Look at what we just did. We started out with one approach and then changed it up radically. And then we changed it up radically again. And again…
At no time did we have to go back to the layouts and change them due to a radical redesign of our application.
Think about what this means for your applications.
How many times have you needed to change something - maybe something not so radical - and those changes have rippled through your entire application leading to massive testing and all kinds of new bugs and issues to figure out? That’s what coupling does to you.
But here we’ve avoided all that, simply because we’ve isolated the content from the mechanics and the logic of the application by limiting coupling.
Doing This With FXML
My belief is that the only way you can do this in pure FXML is via the Stage.setScene() or the Scene.setRoot() methods. To do this, you need to create your layout as a “Custom Control”, as documented at the bottom of this page. This allows you to define a constructor with dependency injection. Now you can instantiate your custom controls with Runnable to swap scenes and you can place each of them as the “root” of a Scene.
What you cannot do is any of the other, purely layout, techniques with the wrapper layouts defined in FXML - as far as I can tell. This is because you cannot pass constructor parameters to your custom controls through an FXML file.
I could be wrong about this. I try hard to know as little about FXML as possible. There might be some way to implement custom builders or some other complicated silliness to do the dependency injection, but you probably wouldn’t be reading this tutorial if you’d already mastered those techniques.
Conclusion
We’ve looked at how to swap Scenes in a Stage without having to look up from the layout code into the Stage to mess with its workings. Then we looked at a number of alternate approaches to dynamically changing the content on the screen without swapping ‘Scenes’.
In the course of doing this, we saw how to use Dependency Inversion and Constructor Dependency Injection to split the mechanics of content swapping away from the layout code and dramatically reduce the coupling in the application.
We created screen layouts that are decoupled from the context in which they are going to be used.
This gives us immense freedom to use those layouts in a variety of situations without needing to do any customization to the layouts to accommodate the context in which they are used.