Introduction
Bindings are the “meat and potatoes” of Reactive JavaFX application design. They are the basic mechanism that allows you to link your View to a Presentation Model so that changes in the View are instantly reflected in your data and visa versa.
There are three techniques to create Bindings in JavaFX:
- The “Fluent” API
- This is a set of methods included in interfaces like,
NumberBindingwhich allowObservableValuesto be modified and transformed in a decorator style. - Create a Custom Binding
- This involves extending one of the abstract
Bindingclasses in the JavaFX library. You can read about it here. - Using the Methods in the Bindings Class
- This is what this article is all about. Read on to find out more…
First, Some Nomenclature:
This can get a little bit confusing. The word “bindings” is used in so many different ways here, that we need to make sure that everyone understands what that word means when it’s used in this article:
- “Binding” the Action
- We’re going to talk a lot about binding things together. It will always be used in lower case (unless it’s the first word in a sentence), and will always be used like a verb.
- “Binding” the Result
- When you bind to properties together, the thing that joins them is a binding. As long as we’re not talking about a specific class of Binding I’ll refer to it as “a binding”, “the binding” or “the bindings”. I’ll use lower case and no fancy formatting.
- “Binding” the Classes
- There are a number of binding classes. These are things like
IntegerBinding,BooleanBindingand so on. These specific classes are pretty clear, but when talking about them in general I’ll be consistent in referring to them as,”Binding”, “aBinding” or, “theBinding”, “theBindings” so that you’ll were talking in general about an example of one of those classes. - “Bindings”the Library
- The subject of this article. It will always be referred to as
Bindings, or perhaps “theBindingsclass”.
Understand Custom Bindings First
The best way to understand what bindings are and how they work is to look at how to create custom Binding classes. I strongly recommend that you read my tutorial on Custom Bindings.
What is the “Bindings” Class?
The Bindings class is a utility library consisting of around 200 static methods that create or manipulate Bindings. I’ve made an effort divide them up into a number of different types, and we’ll look at these with examples of how they can be used. Once you understand what’s in this library, you’ll probably never need to create a Custom Binding again, unless you’re doing something really off beat.
The “Create” Methods
Possibly the most useful methods are the “Create” methods, and there are 7 of them. One for each of the most common Property types you might use. So we have createBooleanBinding(), createStringBinding and so on. Let’s look at createStringBinding() as an example. The method signature looks like this:
static StringBinding createStringBinding(Callable<String> func, Observable... dependencies)
Obviously, it’s a static method and it returns a StringBinding. The first parameter is a Callable that returns a String.
What’s Callable?
Callable is a Functional Interface which is virtually identical to Supplier, except that it’s single method is call() instead of get(). It’s a method that takes no parameters and returns a value - in this case a String. Since it’s a Functional Interface, it can be implemented via a lambda function or a method reference. Unfortunately, they chose to call this parameter func, which is really confusing for beginners. It’s not a Function.
Now it’s a parameter to createStringBinding(), which means that you have to create a Callable<String> and pass it to this method. Before we look at this more closely, we’ll take a look at the remaining parameters.
The next parameter is Observable..., which means that it’s a vararg, and you can pass it as many arguments as you like, just so long as they are all Observable types. It calls these parameters, dependencies, which is a good clue as to what they do.
At this point, I’m going to suggest that you look at my article on custom Bindings one last time, because the rest of this explanation relies on it.
With a custom Binding, you need to specify two things. The first is an implementation of computeValue(), which is a method which takes no parameters and returns a value - and for a custom StringBinding, that would be a String.
You can probably see that computeValue() just about fits the definition of how Callable<String> works. And that’s exactly what it is. However you define that Callable<String>, it’s going to function exactly the same way that computeValue() would in a Custom Binding.
The second thing you need to do with a custom Binding is to make a call to super.bind() in its constructor. This establishes the dependencies for the Binding. And you’ll notice that this second parameter just happens to be called, “dependencies”. What a coincidence!
Now you can see that createStringBinding() is really just a short-hand way to create a custom Binding in a single line of code. I find that I very rarely create custom Binding classes manually, especially as anonymous inner classes, because it’s just so much easier to use one of these Bindings methods. It looks cleaner too.
Every suggestion I make about custom Bindings holds true for any Bindings created via these methods. Make sure that you call the get() method of each of the dependencies in your func parameter, just as you would in computeValue()
An Example
public class BindingsCLassDemo1 extends Application {

    public static void main(String[] args) {
        launch();
    }

    @Override
    public void start(Stage stage) throws IOException {
        Scene scene = new Scene(createContent(), 620, 340);
        stage.setScene(scene);
        stage.show();
    }

    private int divisor = 1;

    private Region createContent() {
        ObjectProperty<Integer> number1 = new SimpleObjectProperty<>(100);
        ObjectProperty<Integer> number2 = new SimpleObjectProperty<>(30);
        BooleanProperty evensOnly = new SimpleBooleanProperty(false);
        Label label1 = new Label();
        label1.textProperty().bind(number1.asString());
        Label label2 = new Label();
        label2.textProperty().bind(number2.asString());
        Label results = new Label();
        results.textProperty().bind(Bindings.createStringBinding(() -> calculateAmountAsString(number1, number2, evensOnly), number1, number2, evensOnly));
        HBox labelBox = new HBox(10,
                new Label("Number 1:"), label1,
                new Label("Number2: "), label2,
                new Label("Results: "), results);
        Button button1 = new Button("Increase Value 1");
        button1.setOnAction(evt -> number1.set(number1.get() + 1));
        Button button2 = new Button("Increase Value 2");
        button2.setOnAction(evt -> number2.set(number2.get() + 1));
        CheckBox checkBox = new CheckBox("Evens Only");
        evensOnly.bind(checkBox.selectedProperty());
        HBox controlBox = new HBox(5, button1, button2, checkBox);
        VBox vBox = new VBox(40, labelBox, controlBox);
        vBox.setPadding(new Insets(30));
        return vBox;
    }

    private String calculateAmountAsString(ObservableObjectValue<Integer> property1, ObservableObjectValue<Integer> property2, ObservableBooleanValue evenOnly) {
        int result = (property1.get() + property2.get()) / divisor;
        System.out.println("computing " + property1.get() + " " + property2.get() + " divisor: " + divisor + " result: " + result);
        divisor++;
        if (evenOnly.get()) {
            return Integer.toString(((result % 2) == 0) ? result : 0);
        }
        return Integer.toString(result);
    }

}
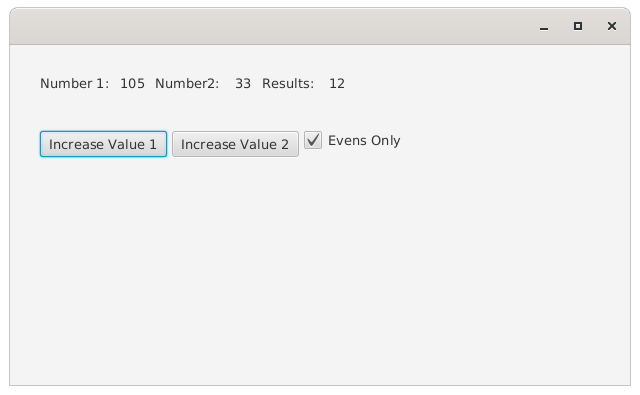
This is a bit goofy, and it certainly doesn’t do anything too useful, but it does demonstrate all the key points you need to understand about the create methods in Bindings. When it runs, it looks like this:
and the console output looks like this:
computing 100 30 divisor: 1 result: 130
computing 100 30 divisor: 2 result: 65
computing 101 30 divisor: 3 result: 43
computing 102 30 divisor: 4 result: 33
computing 102 31 divisor: 5 result: 26
computing 102 32 divisor: 6 result: 22
computing 102 33 divisor: 7 result: 19
computing 102 33 divisor: 8 result: 16
computing 103 33 divisor: 9 result: 15
computing 104 33 divisor: 10 result: 13
computing 105 33 divisor: 11 result: 12
This example is very, very similar to the first example from the Custom Binding class tutorial, and the results should be identical to that example.
Which Method to Use
Here we use Bindings.createStringBinding() because we are going to bind the results to the Text property of a Label, which needs a StringBinding. This is useful here because is shows how we can handle the conversion from numbers to the correct type for the application right in the method call.
With the custom Binding example of this, we left the Binding as an IntegerBinding and then use the Fluent API method asString() to convert it to a StringBinding. This made sense as the custom Binding was dealing with numbers and, as a stand-alone class, there isn’t any context to suggest that the result should be anything other than some sort of numeric Binding.
In this case though, we’re calling the Bindings method as part of the .bind() method call, meaning that the context is well defined. We need a StringBinding, so we should use a method that returns that.
How it Works
The key point to remember here is that, just like with computeValue(), the code in the Callable parameter func is dealing with concrete data classes, not Property classes. When it does deal with Property classes, it’s just to extract the current value of the data that they contain via their get() or getValue() methods. And the Callable returns a concrete data class, not a Property or Observable.
This makes the code simpler, but it’s also counter-intuitive and trips up a lot of beginners.
You should follow the general rules for using lambdas in any place. Readability drops dramatically when they have more than one line. So stick to expression lambdas (instead of statement lambdas), and call methods when your lambda gets too big. That’s what’s happening here, so we’ve got a separate method to do the calculation.
This should underscore how close this is to a custom Binding: To create this code, I just copy/pasted the computeValue() code from the custom Binding example I already had and renamed it to calculateAmountAsString(), and then inserted the parameter list from the custom Binding’s constructor. Some small modifications to add calls to Integer.toString() and it was all done.
How Important Are These Methods
These 7 methods can do just about anything you need to do. The rest of the methods described in this tutorial… I don’t use them too much myself. For me, it’s often just as clear to use create{type}Binding(), as it is to use any of the other methods in this library, and there’s a little bit of extra consistency.
Let’s look at an example:
IntegerBinding binding = Bindings.createIntegerBinding(() -> propertyA.get() + propertyB.get(), propertyA, propertyB);
That’s pretty clear. The two values are just added together. The alternative is:
NumberBinding binding = Bindings.add(propertyA, propertyB);
Which is, admittedly a little bit simpler. However, if the requirements change and now it needs to be “average” instead of “sum”. Then the second example becomes:
NumberBinding binding = Bindings.divide(Bindings.add(propertyA, propertyB), 2);
or alternatly using the Fluent API:
NumberBinding binding = Bindings.add(propertyA, propertyB).divide(2);
Both of which start to become a little bit more complicated. Now maybe this starts to become a better way:
IntegerBinding binding = Bindings.createIntegerBinding(() -> (propertyA.get() + propertyB.get())/2, propertyA, propertyB);
or possibly:
IntegerBinding binding = Bindings.createIntegerBinding(() -> findAverage(propertyA.get(),propertyB.get()), propertyA, propertyB);
Well… maybe not so much in this case, but you get the idea.
Personally, I find that the Fluent API is great as long as the relationships and manipulations are simple and straight-forward. But when it starts to get more complicated, the Fluent API makes it even more complicated. When you find yourself scratching your head trying to figure out how to do something with the Fluent API, you probably should just stop and use Bindings.create{type}Binding() instead.
The Operation Methods
This set of methods is aimed pretty squarely at the functionality provided through the Fluent API. Basically, these methods allow you to manipulate and combine both Observable and concrete values into a Binding of some type. You’ll find that these methods often overloaded, so that you can generally just pass them the parameters that you have and you’ll automatically invoke the right method and get an appropriate Binding type back.
We have the following groups of operations:
The “Manipulation” Methods
- Concat
You pass this method a vararg of Strings and Observable String types and it will create an StringExpresson, which implements ObservableStringValue. - Format
This method takes a format string and a vararg of Strings and Observables and it will create a StringExpression. - Size
This method will create an IntegerBinding from some kind of Observable Collection, binding to the size of the Collection. - When
This method takes a ObservableBooleanValue and turns it into an instance of When. This is a whole subject in itself that is best discussed in the context of the Fluent API.
The “Boolean” Methods
There’s a set of methods that return a BooleanBinding. For each of these you can supply a mixture of Observable and concrete data types and the method will create a BooleanBinding:
- LessThan and GreaterThan (including …OrEqual versions)
- IsEmpty and IsNotEmpty
- Equal and NotEqual
- And and Or
The “Mathematical” Methods
There are a set of methods that return DoubleBinding or NumberBinding and perform mathematical operations on concrete number types and numeric ObservableValues:
- Max and Min
- Multiply and Divide
- Add and Subtract
- Negate
The “Extraction” Methods
Sometimes you need to create a relationship between an ObservableIntegerValue and an ObservableList of some nature. This is potentially tricky to do, but these methods make it relatively easy.
List and Map Extractors
These are the valueAt methods. For ObservableLists you can either supply an ObservableIntegerValue or an int and these methdos will return an ObjectBinding of whatever type is in the ObservableList.
For ObservableMaps, you supply either a key value or on ObservableValue as the same type as the ObservableMap's keys and these methods will return an ObjectBinding of whatever type make up the values in the ObservableMap.
Member Extractors
These are a set of methods that are all named like select{Type}(), so selectInteger() or selectBoolean().
Sometimes you have ObservableObjectValues that are composed of other ObservableObjectValues, which may be composed of other ObservableObjectValues in turn. If those ObservableObjectValues have their components implemented as JavaFX Beans, then you can use these methods to extract the member values.
Let’s imagine that we have an ObservableObjectValue<CustomerOrder>, where CustomerOrder has a member which is ObservableObjectValue<Customer>, called customer. And Customer has a member which is ObservableObjectValue<Address> called address. And Address has a member which is ObservableStringValue called streetName.
Let’s also assume that all of the members are implemented as JavaFX Beans. So there’s a method CustomerOrder.customerProperty(), and one called Customer.addressProperty(), and one called Address.streeNameProperty.
In this case, you can do the following:
ObservableObjectValue<CustomerOrder> order = ...
StringBinding binding = Bindings.selectString(order, "customer.address.streetname")
The “Bind” Methods
The last few methods are used to bind (or effectively bind) two elements together.
First, we have bindContent(). This allows you to bind a normal List to an ObservableList, a normal Set to an ObservableSet, or a normal Map to an ObservableMap. Once you’ve bound them, the normal Collection will be kept in sync with observable Collection, but you won’t be able to manually update the normal collection any more.
Then there is bindContentBidirectional(). This allows you to synchronize the elements of two observable Collections.
Finally, there is bindBidirectional() which is used to bind a StringProperty to some other kind of Property through either a Format or StringConverter.